Showing posts with label with kids. Show all posts

Saturday, May 24, 2014

Embroidery with kids


I have just learnt a very valuable lesson. Never underestimate what your child can do. Also try many different things with your child, because you never know what they think is totally awesome and fun to do. We've been a bit sick this week, Emma the most. So yesterday when we decided it was best to stay home and just rest the day, I knew I had to come up with something fun to do.

As soon as I took my embroidery hoop to start a project myself, she asked if she could try it too. She's never ever tried doing embroidery so I got a piece from our non-slip mat, blunt needle and embroidery thread.


 I was stunned how excited she was. Usually her attention span lasts for 10-15 minutes, but with this we were going for over an hour. I think all the different colours helped. I cut a short piece of the colour she wanted, started it for her and then she went up and down with the needle. Once the thread was finished she got to choose another colour and so forth.

The non-slip mat works great because it has big holes in it and is very easy for little hands to handle. We had a little break after an hour to have lunch and then after lunch she went back to work! WHAT!! was my reaction.


This is super good way to let your little once practise embroidery. Who cares if it doesn't make a picture, they are still practicing fine motor skills. I think this would have enough of practise for her, but because I was embroidering on fabric, she wanted to make a picture on fabric as well.

Straight away the challenge was that she had to use a sharp needle (I tried to explain this to her, but she didn't care). The next challenge was that embroidery for a 3,5 year old is very very difficult when she can't even draw colour inside the lines yet. I thought that straight lines are probably the easiest way to go, so I drew her different geometric shapes to choose from. A square, a house, a diamond, a triangle... She wanted to do a rainbow...


Geometric rainbow it was to be then, a good compromise I thought. I drew the lines with a sharpie (I don't care if they show) and I also was dictator enough to force the colours in the right order. But after that she did almost everything herself. Of course I helped her to make the knot at the end of the thread, but she was very precise as to where the needle was coming up and where it was going down. The sharpie actually helped a lot on the wrong side as well, because she could see it on that side too.


 GOSH I'M PROUD! Did I mention that yet? I couldn't believe my eyes when I saw her going. Not once did she poke herself with the sharp needle and I sat right next to her the whole time with my jaw on the ground. She is 3,5 years and just made her first proper embroidery work! I'm so stoked, and so is she.


It is now on a prime spot on our wall, but I'm hoping to move it to my craft room wall soon. She was so excited to show her rainbow to her dad and this is surely one of those crafts that will be saved forever!

So want to see what I made myself?


It is a giraffe that Emma's drawn. I really really love it so I thought I needed to embroider it. Yesterday ended up being all about Emma, but what a happy day it was for her even though she was sick.


 Once again, if you try embroidery with your child, please please send me a picture. I would LOVE to see their creations!

Sunday, May 11, 2014

Mother's Day 2014

OH MY GOODNESS people! I have been pinching myself the whole day. I am one lucky mama. Not only do I have beautiful children with amazing personalities, but I have an unbelievable husband who keeps surprising and spoiling me time and time again. Wait till you see the present they made me, it will blow you away! But first few photos from our Mother's Day photo shoot. We just couldn't get any with both of the kids with me, so individual photos it was. My poor Noah fell over earlier in the week so he has a nice cut under his nose, in case you wonder.


I'm not the easiest person when it comes to different occasions. For example on birthdays I don't need presents from my husband but instead I want to do things together as a family that I will remember. Then on Mother's Day and Father's Day I want the present to be handmade by the kids (at least to some extent). So because the kids aren't in school yet to make me something for Mother's Day, my poor husband has to come up with something that the kids can make. This year will probably top every following year, it is that AMAZING!


 I KNOW, RIGHT?!!! AHMAZING!! Apparently Emma had been smashing the tiles and she was so excited to tell me how much fun it was that she got to go bang, bang, bang. Then together with her dad they assembled them on the pot. I think it's the most amazing handmade present I have ever gotten. Thank you my darlings, I am so lucky to have you in my life.


Monday, March 31, 2014

Portrait of a 3 year old


I am so in love with this portrait that Emma made today! Well yes I did help her a bit, but we'll get to that in a moment. First, THIS was our inspiration. I love pinterest and Emma loves hovering over my shoulder, so when she saw that picture, she asked me if she could make one like that of herself and I jumped right up from the couch to get our painting gear ready. Please don't mind the blurry pictures that I took with my phone, it's like a second nature that phone nowadays that I've totally forgotten what a normal camera looks like.

I'm always beating myself up when I try to direct the way she is creating her art, but this time I thought that it might be fun to make it together. Help her where she wants/needs help and just enjoy the time that we are painting together. This attitude adjustment was all I needed and we had so much fun, in the end I realised she did most of it on her own anyway. But just to be clear with you all, I'll tell you what my role was, aka what I did and what's all her.


 We started out by painting the head; she did that all by herself. I made the neck and the outline of her shirt as her drawing level is not there yet, she then coloured them in. She also painted the eyes and asked me to draw the mouth as she wanted it to be like in the picture.

We used acrylic paints for the whole picture, but for the hair I gave her cups with a very little water and she mixed some paint in them. I helped her in dropping some of the watery paint mixture around the face and she blew through a straw to make funny hair.


Above is what the picture looked like after she was done with the paint. I gave her a marker and asked her to draw the nose and the eyebrows. Then I went around the eyes, the mouth and the head with the marker. Below is the finished picture.


I think this picture will be framed for a very long time. It was so much fun to do and she is so proud of what she's created. If you look at the picture at the very top you'll see photo where she is about one month old. I can't believe 3 and a half years later I have a picture next to that photo made by that little baby girl. How amazing are these little people, how much talent there is, it all blows me away. And wow how truthful that self portrait is of her, so much attitude and craziness and I am so lucky to be able to be part of her world everyday. Bless you little artist.

Friday, March 7, 2014

Painting with ice

Sorry guys, I've been away for a long time. Truth is, as my holidays were coming to an end, I wanted to unplug a little for the remaining weeks and decided to play more with my kids and spend less time on the computer. It worked great and I don't think I've ever read so many books and sang so many songs as during those last weeks of my holiday. Now I'm back at work and slowly getting into some sort of routine. Both of the kids are having a nap after a long week so I thought to say hi.

HI!

I'd love to share something we did while I was still holidaying. We call it ICE PAINTING!


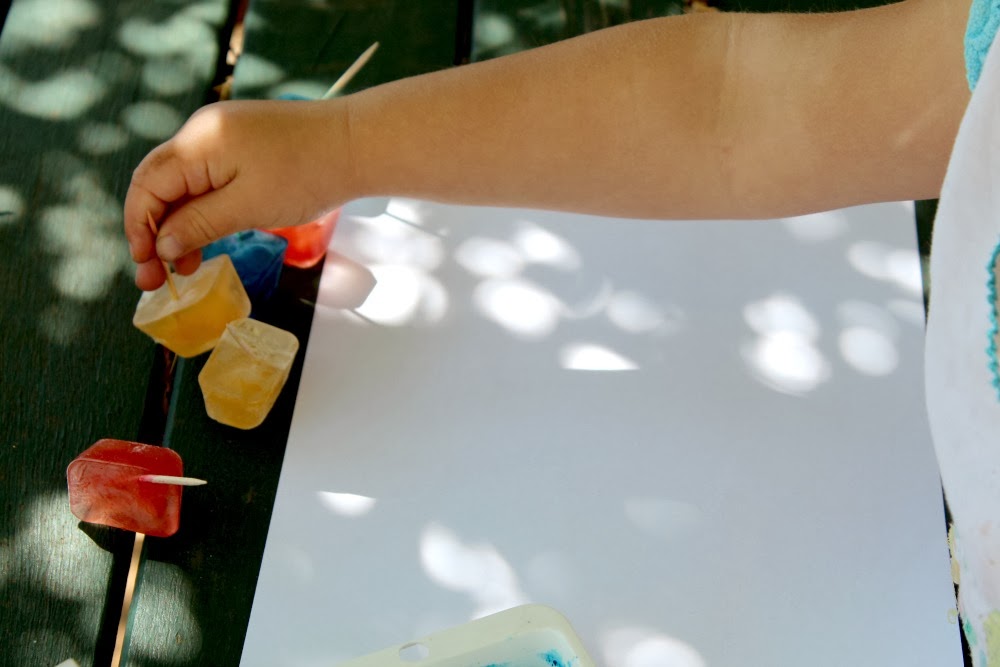
All you need is some water, food colouring, toothpicks and an ice tray. So make some coloured ice cubes and put a toothpick in for each ice cube, that way they are easier to hold when painting.

And to my Finnish friends: Ei tarvii odottaa kesään, kokeilkaa joku tehdä tätä saunassa ja kertokaa mulle miten sujui!!!


Once the ice cubes are frozen, make yourself a painting station outside, choose a sunny day and start painting. My kids loved seeing to colour coming off from the ice cubes as they started to melt.


In the end we put all the remaining blocks in water and watched the water change colour.


SUCH FUN!

Let me know if you've tried this and tell me how you went, even better if you take a picture of it!


Thursday, January 9, 2014

Finger painting from 2011

Edit: Yay I found this post! It's from my old blog, written in November 2011! Crazy how time has gone so fast. And how come I didn't remember that this finger paint is so easy to make! Oh well, we're going to give this a go too so that Noah can get messy too. Enjoy for the glimpse to the past!  

Last week was a bit like a holiday for us. My husband took the week off and spent it with us, because today he is starting at the Police Academy and we will only see him during the weekends. It was so nice having him around, but still we were busy doing things around the house all week.

So I thought we should do something together with Emma.

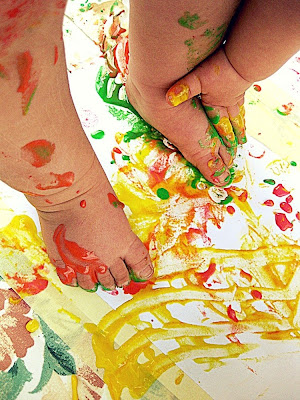
One part water, one part flour and then some food colouring! That simple!

It was perfectly sunny and warm day to do it, so we went outside, stripped her nearly naked and started painting.


First some paper and then some feet.


And then anything we could find.


It was so much fun! I recomend it to anyone.

Wednesday, January 8, 2014

Summer fun with finger paint (thermomix recipe)


Part of my husband's job is to work as long as you are required to work. So sometimes when he's suppose to finish at midnight, he doesn't actually get to finish until 8am and be home at about 9am. This was the case just yesterday morning. In these circumstances I have to come up with some sort of activities to do with the kids that doesn't make much noise and is preferably outside.

Yesterday morning I thought it was time to try what sort of finger paint the thermomix would make. We used the recipe from the everyday cook book (I halved the recipe thats's in the book), but you could do this without the thermomix too.


Recipe:
  • 35g of cornflour
  • 20g of sugar
  • 1/2 tbs salt
  • 235g water
Just mix all these ingredients in a pot and heat it up until it goes thick (like cornflour does). If you're not doing it with a thermomix, you do have to keep mixing it until it goes thick. It's that simple. Then just divide the mixture into little containers, add your food colouring and mix it in.


The paint this makes is a rather gooey kind, more like jelly than paint. Emma still loved it and painted heaps. She tried what different colours make when you mix them together. She squeezed them between her hands and had a blast. Noah on the other hand didn't find the texture very inviting and only poked his fingers in it.

I have made finger paint before, when Emma was about 1 and I like that recipe better. I might find that and give it a go as well, after all it is really warm at the moment and we like playing outside before it gets too hot. It's fun to play with edible finger paint because then you can do this:


She became a green monster! Oh I forgot to tell you, WHEN you start painting with finger paint and if it's summer, let your kids go nude, it's so much more fun when you don't have to worry about getting your clothes dirty. When we were finished I just put Emma in the shower and she cleaned herself off. This was so much fun and we are definitely going to do this again.